
My mom and I are both unemployed and applying for jobs like crazy right now, but have decided to take one day a week until we get jobs to do something crafty/pinspired. So, we decided to both make a wreath for our first of many weekly pinterest-inspired crafts. (Once one/both of us are employed, we still plan to do this weekly, we'll just have to move it to an evening instead) Here is my Pinspiration:

Now, this was a wreath someone was selling on etsy, so there were no tutorials. But it looked simple enough, so I gave it a try. I loved the argyle design, the simplicity, and the fact that it is a reminder that sweater weather is hopefully just a few weeks away. I headed to our local JoAnn's and bought the following:

- 2 skeins of Wool-Ease worsted weight Lion Brand Yarn in Wheat (number 402). It was on sale at JoAnn's 2 for $5. The texture didn't matter much since I was just going for the look, not the texture. I ended up only needing one skein to wrap the entire wreath.
- 1 skein of Lion Brand "Vanna's Choice" Yarn in Magenta. (You don't need a whole lot, so if you have extra scraps of yarn at home, you could just use that).
- 4 sheets each of two colors of felt. I actually only needed one sheet of each color I wanted, I don't know what I was thinking when I bought 4 of each! I got an olive green and a chocolate brown
- 1 14-inch straw wreath. Typically, I use styrofoam wreath forms for my wreath projects, but since I was wrapping this wreath, I went for the cheapest option. The straw wreath was only $2.99 and a 12-inch styrofoam wreath was $4.99.
- You will also need some straight pins, but I didn't need to buy those since I already had them on hand.

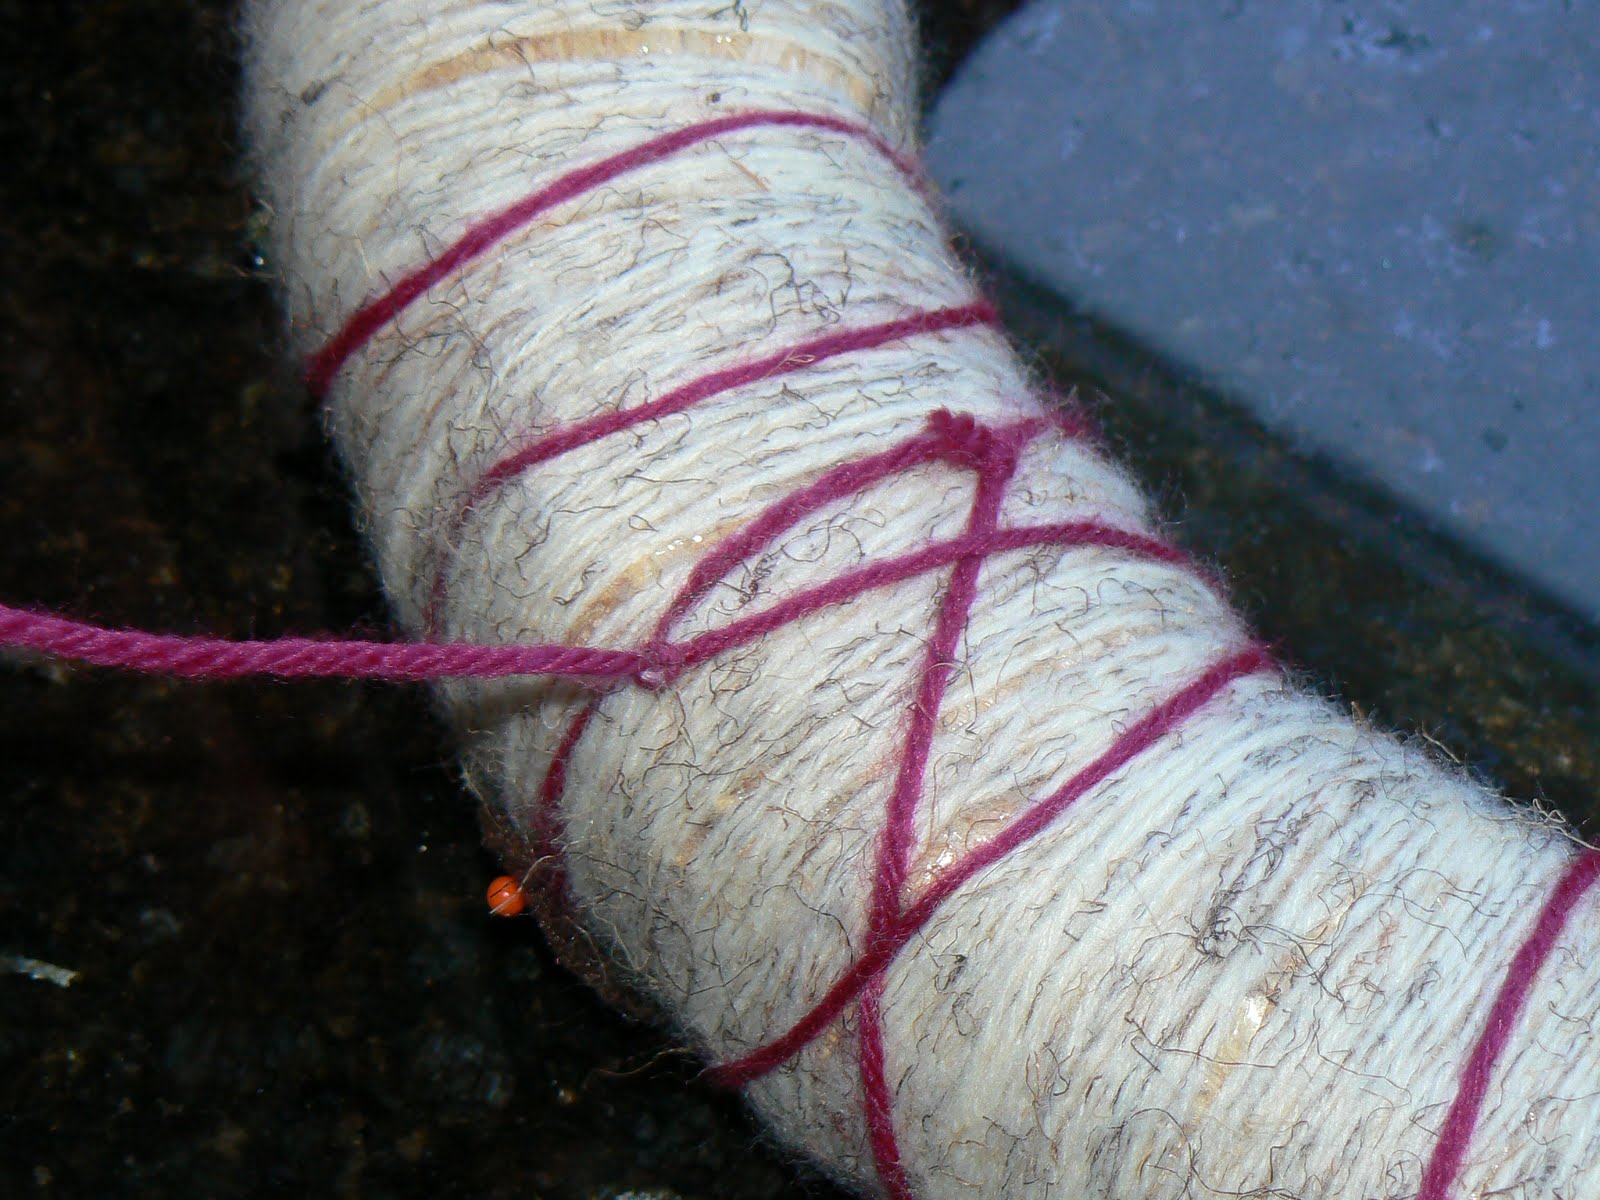
Then just wrap, wrap, wrap, wrap. Make sure when you do this that you hold the yarn TIGHT to each piece you've already wrapped. You also want to make sure you pull it tight. With the gauge of this yarn, I had to pull it super tight and keep it tighter together, but if your yarn is thicker, you could probably leave it a little looser. It actually would give it more of a cozy & cuddly look.

Like I said, wrap wrap, wrap, wrap. It gets boring. And it gives your arm a workout. I got into a rhythm of pulling the yarn tight, tossing the yarn ball through the center hole onto my lap, pushing the yarn close to the yarn already wrapped, and repeating. It took me about an hour and a half to do the entire 14-inch form without a break. With a cozy corner on the couch, a good crime show, and sleeping dogs at your side and your feet, it goes by pretty quick. I even had a good bit of yarn leftover. So now, I have an extra skein of wheat I need to find a project for...

When you're finished, you should have something that looks like this:

You might notice there are some places where the straw form peeks through. I left the plastic wrap on the form to keep it from poking out. If I was not covering the whole wreath with detail, I would have been more of a perfectionist while I was wrapping to prevent "bald spots" or even wrapped it a second time. But, I wasn't worried about that since this was really just the base.
The next step is to decide on the size of diamonds you'll use for your argyle pattern. I cut these three to choose from:

After putting them on the wrapped wreath (and adding up how many of each I'd have to cut and attach) I decided on the largest size, which ended up being 3 1/2 inches tall and 2 1/2 inches wide.

I used my sample diamond (which I cut out of cardstock) to trace directly onto my felt. Like I said, I only needed one sheet of each color. I like to line my shapes up with the already cut edge if possible to limit how much I need to cut. That way, I can focus on cutting fewer lines and making them super straight. I find the easiest tool to use when tracing onto felt is a ball-point pen. It even shows up on darker colors because the ink leaves a little sheen.

You'll end up having a bunch of cute little diamonds like this:

Pictured is only six of each color, but for my 14-inch wreath I actually needed 7 of each color. Once they are all cut, I laid them out, alternating colors and trying to line up the side corners of the diamonds by visualizing an invisible smaller circle. Make sure when you do this that each diamond is "face-down" so that any ink lines from your pen tracing are not facing forward.

The next step is to stick a straight pin in each of the diamonds at the top. I chose to stick them on the outside edge. You will remove these later, they are really only used to mark and hold each diamond for correct spacing.

This part is the trickiest part of this wreath, but it's the FINAL STEP! You will take your accent color yarn (in my case, the magenta). To start wrapping this, you will need to tie it just like you did for wrapping the wreath form. I rotated one of my diamonds to "hide" the tie underneath.

Now, the tricky part is to start wrapping the wreath diagonally, trying to center the line on each diamond you pass over. This is tricky to line it up so that it all looks symmetrical and even, but with some precision and focus, it's possible (and actually not as hard as it sounds).

As you can see, the way the back of the wreath looks really doesn't matter. It will be against the door, so if the lines there are crooked, it's no big deal. Once you get all the way around the wreath and have crossed over each diamond once, you will basically start going the opposite direction to cross over again diagonally. You do not need to tie it again at the back. If you have been keeping your yarn pulled tight, it should hold without tying.

The goal now is to cross over each diamond a second time, making the "X" across the center of each shape. Something that also helped me keep things close to symmetrical and even was to try to make a smaller "x" between each pair of diamonds inside the center of the wreath (towards the bottom point of the diamonds).

Once you get all the way back around, you will tie your yarn off. I chose to also pick up a couple pieces of my base yarn to make sure it was really secure. I was really nervous that it would all fall apart once I let go!
Once you have tied it off, you can pull out each of the straight pins because the magenta "x's" will hold the diamonds in place. Finally, I used extra magenta yarn and just layered a bunch of it for my hanger. I cut one piece that was probably about 4-5 feet long, and just kept "folding" it until I had a good, thick bunch I felt could hold the weight of the wreath. I also looped this yarn under the base (wheat) yarn to make sure the magenta wouldn't snap and cause my entire wreath to fall apart.

And you're done! Here's the completed wreath:

I think it's a perfect transition wreath from summer into fall. I didn't want to get too fall-typical with pumpkins and corn husks just yet. That's why I chose these colors, too...so that I wouldn't have orange and red on my door for the next three months! I also like this one because it's adjustable. Just since looking at pictures on my computer for blog posting, I noticed some un-even spaces between my diamonds, off-centered "X's"...at least I can slide things around until I like it. Oh, the life of an OCD perfectionist! :o) Total time to make this wreath was about 2 1/2 hours, start to finish. Total cost was about $10 (if you count only what you really need, not the surplus of yarn and felt I bought)! Hope you can use this tutorial, or at least get inspired to make something fun for Fall. I can't WAIT for it to get here! I miss my hoodies, rosy cheeks, football Sundays, and nightly hot chocolate!

VERY CUTE!
ReplyDeleteThis is a great tutorial. I used it as a guide last night to make a Halloween-themed argyle wreath. It is orange with glittery black felt diamonds. I added a crow, spider, and owl as well. I *love* it; it looks professional! I'm very excited to hang it come October. The one thing I did differently, technique-wise, was use hot glue instead of stick pins to hold down the diamonds. Thanks for the clear instructions!
ReplyDelete