Wednesday, July 30, 2014

My Prince Charming...My Real-Life Fairy Tale

I wanted to take the time to write this out, so I can remember every little detail and have it in words forever.  This is mostly for me, for my Michael, and for our (someday) kids...but also an opportunity for those of you who wanted to hear the story of our proposal.  I definitely wrote out more than most of you probably care to read, so if you're just here for the proposal part, scroll down...

Michael and I met in November 2012.  It truly was a deep connection from the start, and I could write a whole book on our love story.  For now, I'm sticking to how we got here, to our ENGAGEMENT (still surreal saying that)!  Shortly after we started dating, we were talking about different places we'd been and I learned that he had NEVER been to Disney World.  I couldn't believe it.  I absolutely LOVE Disney anything...I grew up watching Disney movies on repeat, have dressed up as Disney princesses, and had been to Disney several times (Florida and California).  As our relationship progressed and we started "vacation dreaming," we decided to make Disney one of the trips we would take in the not-too-far-off future.  We even started a savings jar for our trip, and planned to go in 2014.

My very first trip to Disney World, circa 1992
Well, life happened, as it does.  The jar stopped being filled.  We ended up taking some of it out.  So, our Disney trip seemed like a distant dream that we would get to someday.  Fast forward to mid-May.  I'm ending a long and stressful school year, and we are talking about some of the things we'd like to do over the summer.  Michael says "Let's go to Disney!"  I thought he was crazy.  There's no way we can pull a trip like that together so fast.  But...I did some research, got some quotes, and found an AMAZING woman (Doris Thompson from The Magic for Less Travel, if you're looking), who helped us nail down a quick, great trip for a decent price.  We saved pennies, we made some sacrifices, and we made it happen.  (Mostly Michael made it happen, by selling some of his beloved Warhammer stuff, working overnight shifts sometimes to earn a little extra overtime, and holding off on some purchases he was wanting to make).

It took some time for it to sink in.  It truly did not feel "real" to me until we drove under the famous Walt Disney World arch on our first day there.  But...I started planning, reading blogs, booking dining, getting a few new outfits to wear, and making a countdown sign for us to see how close it was getting.

As I was making plans, I recommended to Michael that we try to do a Character Meal while we were there.  These were always highlights of my prior trips to Disney, and a way for us to meet some characters without spending so much time standing in line or using one of our golden Fast Passes to do so.  He agreed, and asked what the options were.  When I told him about Cinderella's Royal Table, he said "That one!  How many people get to be in the castle?!?!"  I agreed, and though I have done character dining before, I had never done one with the Princesses.  I lucked out getting a reservation so close to our trip, but it was for 9:20 at night.  At first I was bummed...we would miss out on seeing the "Wishes" fireworks show above the castle our first night, but maybe we'd be able to see some from inside.

Leading up to the trip, that's exactly what I was focused on.  The TRIP.  The VACATION.  DISNEY WORLD!!  As I started telling friends about our plans to go to Disney, over and over again, they would respond with "Oh, I bet he proposes while you're there."  I would brush it off, saying "Probably not..."  Michael and I had been talking about getting engaged within a year or so, but I didn't suspect anything to be happening any time soon.  But, I would be lying if I said those little whispers didn't get me hoping a little.  What Disney girl wouldn't LOVE to get proposed to at Disney World?  What I expected to happen was for him to propose in front of the castle or something like that IF he did propose on the trip.

So Michael and I got to Orlando the day before our first day at the parks.  Part of making this trip happen was booking HORRIBLE, cheap hotels.  We got into Orlando on Wednesday, showered, and did Downtown Disney the first day.  It was a nice way to start our trip and get into the Disney spirit.  That night, we both slept horribly.  On Thursday, we got up, showered, got dressed, and headed to Port Orleans Riverside (The Disney Resort we were staying at that night) to see if we could at least drop our bags off.   We were tired, hungry, and not too cheerful, but also excited to start our day at Disney World.  To our surprise, our room was ready when we got there at 7:30am!!  This was such a nice surprise!  So, we unloaded the car, squealed at how amazing our room and the resort were, and then jumped on a bus to head to Magic Kingdom.

I won't go through every detail of our day, but will tell you that it was awesome!  With resort reservations, we were able to get in a little earlier than other guests, so got in a few rides before the lines were long.  We took lots of pictures, met some characters, and rode a lot of the attractions.  It was a HOT and HUMID day.  After Splash Mountain, we made a plan to go get some ice cream and then head to Animal Kingdom.  Unfortunately, the train was stopped, which meant we couldn't get to a bus or the Monorail without going through the parade crowd.  By the time we could, we decided to just head back to the room for a little rest before our evening out.

Before the trip, Michael suggested we dress a little nicer for our dinner at the castle.   So after a much needed break in the room, a little pizza, and showers, we got all dressed up and headed to the bus stop.


At our Disney Resort, Port Orleans Riverside, right before dinner. 
THE PROPOSAL...

I remember throughout the day and especially at this point, Michael had been pretty quiet and a little "off".  I definitely asked him at least 10 times if he was okay, if something was wrong, and even if he was enjoying himself.  This is the Happiest Place on Earth!  How could you not be boasting with excitement?  But, he reassured me, saying he was fine, he was LOVING Disney, and maybe he was just a little tired.

We got to the park I think around 7:30 or so.  We headed straight to the restaurant to see if we could check in and make sure everything was set with the reservations (Michael did this while I stood aside...little did I know what plans he was actually checking on).  He came back and told me we can't check in until 9:00 but we needed to stay close-by.  They had already let us through one set of ropes and would soon be roping off even more so they could prepare for the fireworks.

We went in a few souvenir shops and enjoyed site-seeing.  While we were in one of those shops (Castle Couture, right next to the castle), Michael spotted a small room where there was a photo backdrop and a photographer.  We took advantage and asked her to snap some pictures of us before dinner.  I was so glad we found this little gem!  The photographer really took her time with us, posed us several different ways, and even took some extra pictures.


After our "photo shoot" we still had a little time to kill, so we rode the carousel.  Not the most thrilling ride, but it was definitely part of this memory for me...listening to Disney music on the organs, all lit up, and looking out at the glowing castle.


By this time, it was about 8:50, so we went over to the castle (which was already roped off) and waited until our check-in time.  Around 9:00, we checked in, and were brought into a waiting area right inside the building.  Cinderella arrived, and we took our picture with her.  Then we took a seat along the wall, and waited.  And waited.  And waited.  We were starting to get pretty hungry, and Michael was (I learned later) starting to get really nervous we wouldn't be seated in time for the fireworks.  The hostess came over and took Michael to the front, apologized for our long wait, and gave us two BONUS Fast Passes to use whenever we wanted.  I do have to say, they were very apologetic, and although we were a little frustrated, it wasn't that bad of a wait.


After waiting for about 40 minutes, the fireworks began going off.  The hostess ran over, and told us we could go out and watch the fireworks if we wanted, and she would let us know when our table was ready.  We went out and started watching the fireworks in the tunnel of the castle with a small group of people.  We were only there about 2 minutes when the hostess came running back and said we could be seated if we were ready.  We decided to go ahead and head inside.


I cannot even describe to you the elegance of this room.  The incredible view of the fireworks.  The fantastic service.  We were seated at a romantic, two-person table in front of a beautiful window.  We were given two "Wishing Stars" as we sat down, as well as our menus.  I could hardly be bothered with the menu because I was so overwhelmed with the fireworks show.  I have never been so close.  You could feel the explosions vibrate in your body, and had to squint a little because they were so bright!  They also had the music for the show playing on the speakers, so it was all coordinated perfectly.

Our server came back with some bread and took our food orders, and also gave me a magic wand, and Michael a sword.  Michael and I both got the Crab and Corn Chowder for an appetizer, which was SOOO good.  Before I had even finished my soup, our dinner arrived, Steak and Shrimp for both of us.  The fireworks show came to an end and I remember saying over and over to Michael, "This is awesome!  So cool!  Amazing!"  As we are eating our meal, the Princesses were announced one by one, and came out to individually visit our tables.  Before they introduced each Princess, trumpets would play pretty loud, so you knew a new princess was entering the room.  We had fun meeting the princesses, Snow White, Aurora, Merida.  They all would say something to Michael about how he needs to take care of me, how I was his princess, all those sweet and cheesy things.  At some point during this time, we finished our dinners and our plates were cleared.  Dessert was next. 

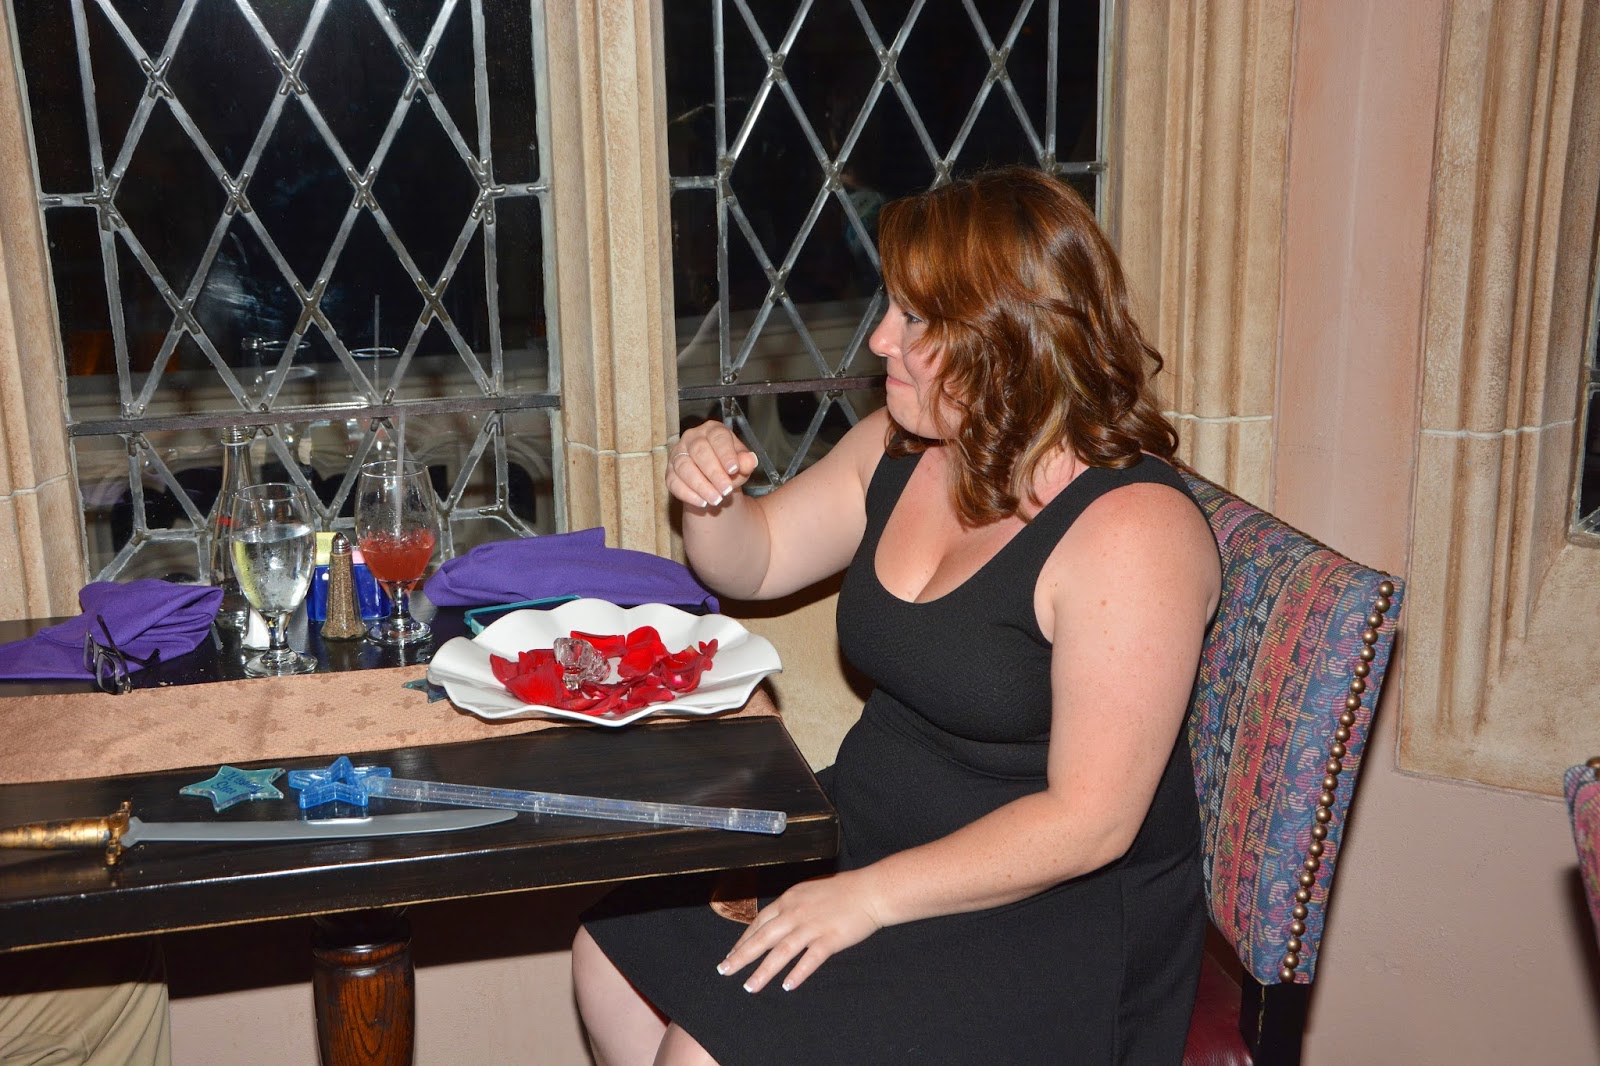
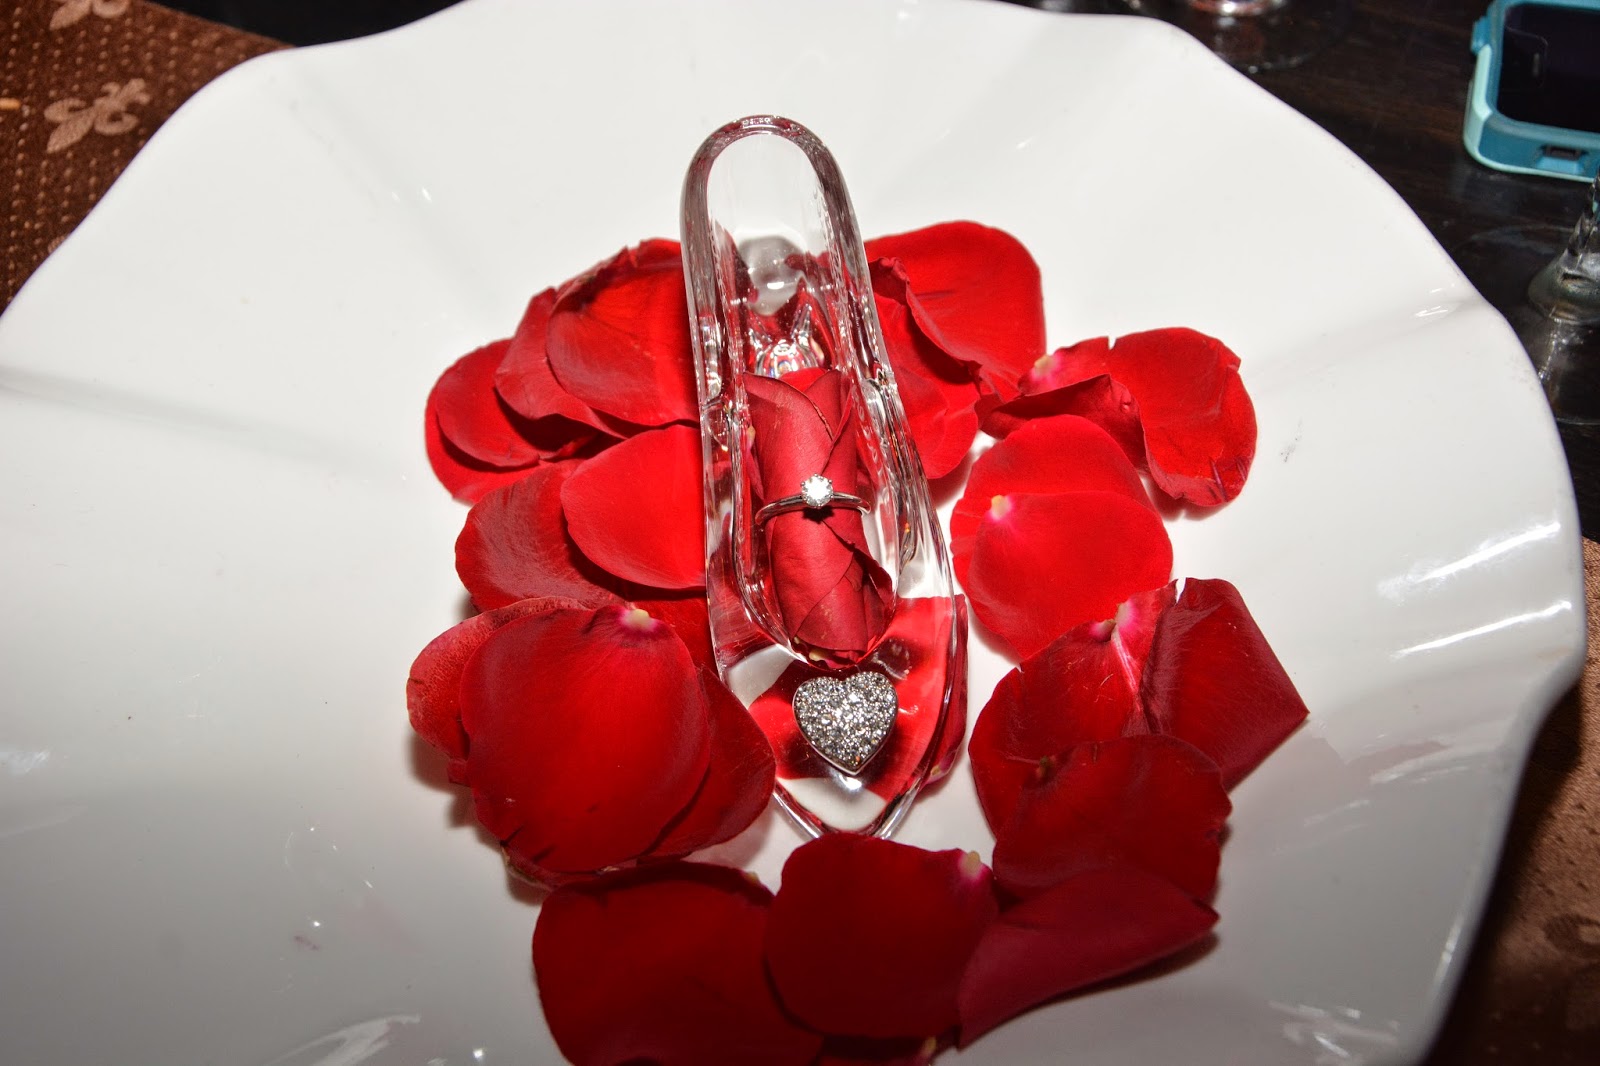
The trumpets sounded again.  I looked to the doorway, where the new Princess would come out, but didn't see anyone coming, so I turned back to Michael.  Our server came over and set down a white plate in front of me covered in a white dome.  He said something like "This is for you, Princess..." and took away the dome.  On the plate was a bed of red rose petals and a glass slipper.  I was confused.

I'm thinking "Uhh...I didn't order this" and "Where is my dessert?!?!"  I look at Michael and he's grinning.  I know I looked at him and at the plate several times, frozen, stunned, and speechless.  "Well, read it!" he says.  I read the side that is facing me and it says Stacey & Michael.  The date, July 24, 2014 is engraved on the bottom.  I said, "Aww!!" as turn it over to read the engraving on the other side.   


Will you marry me? Wait...what?!?!?  At this point, Michael is shuffling around.  I realize what is happening and look up at him, tears filling my eyes, lips quivering.


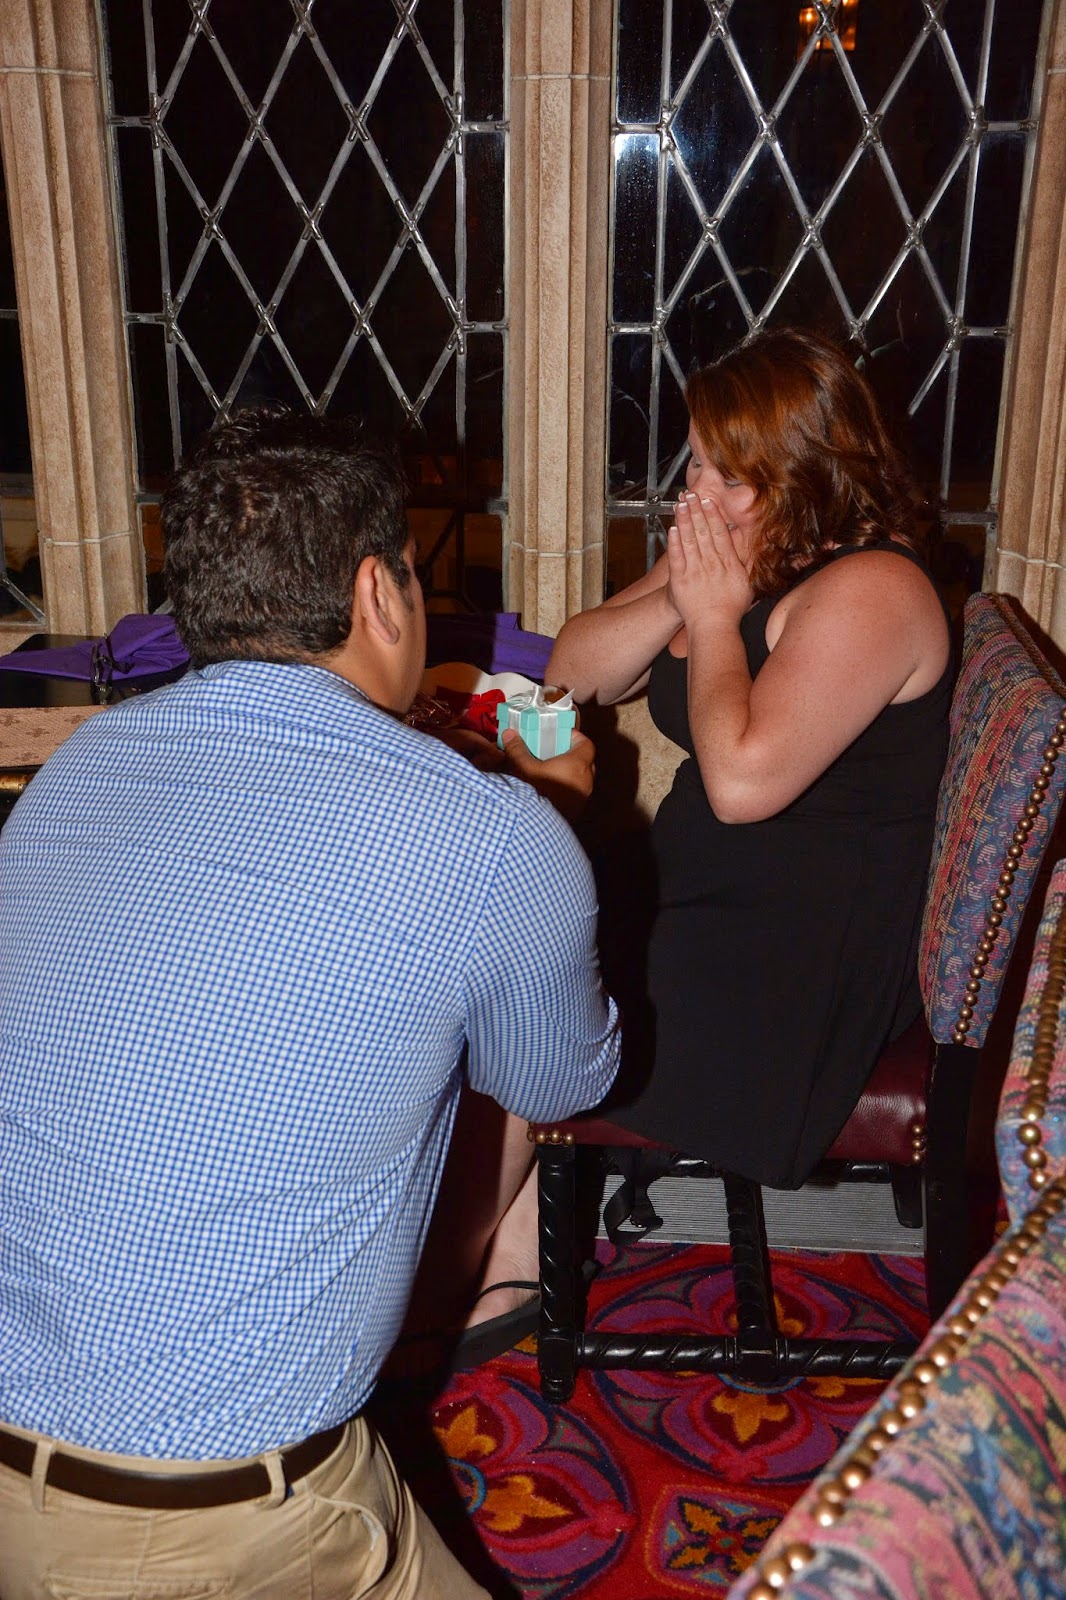
He gets up from his seat and gets down on one knee, and I am trembling.  I cover my mouth, and the realness of this moment is setting in.


I have always heard women say that at this moment, they don't remember anything.  It's almost like they black out and can't even draw the strength to take in the words that are said.  I've never believed it...but that is exactly what happens.  I vaguely remember a photographer being there.  I do remember guests at other tables gasping.  I remember his face.  His hopeful eyes, his proud and loving smile.  Gosh, it's making me tear up again as I write this!


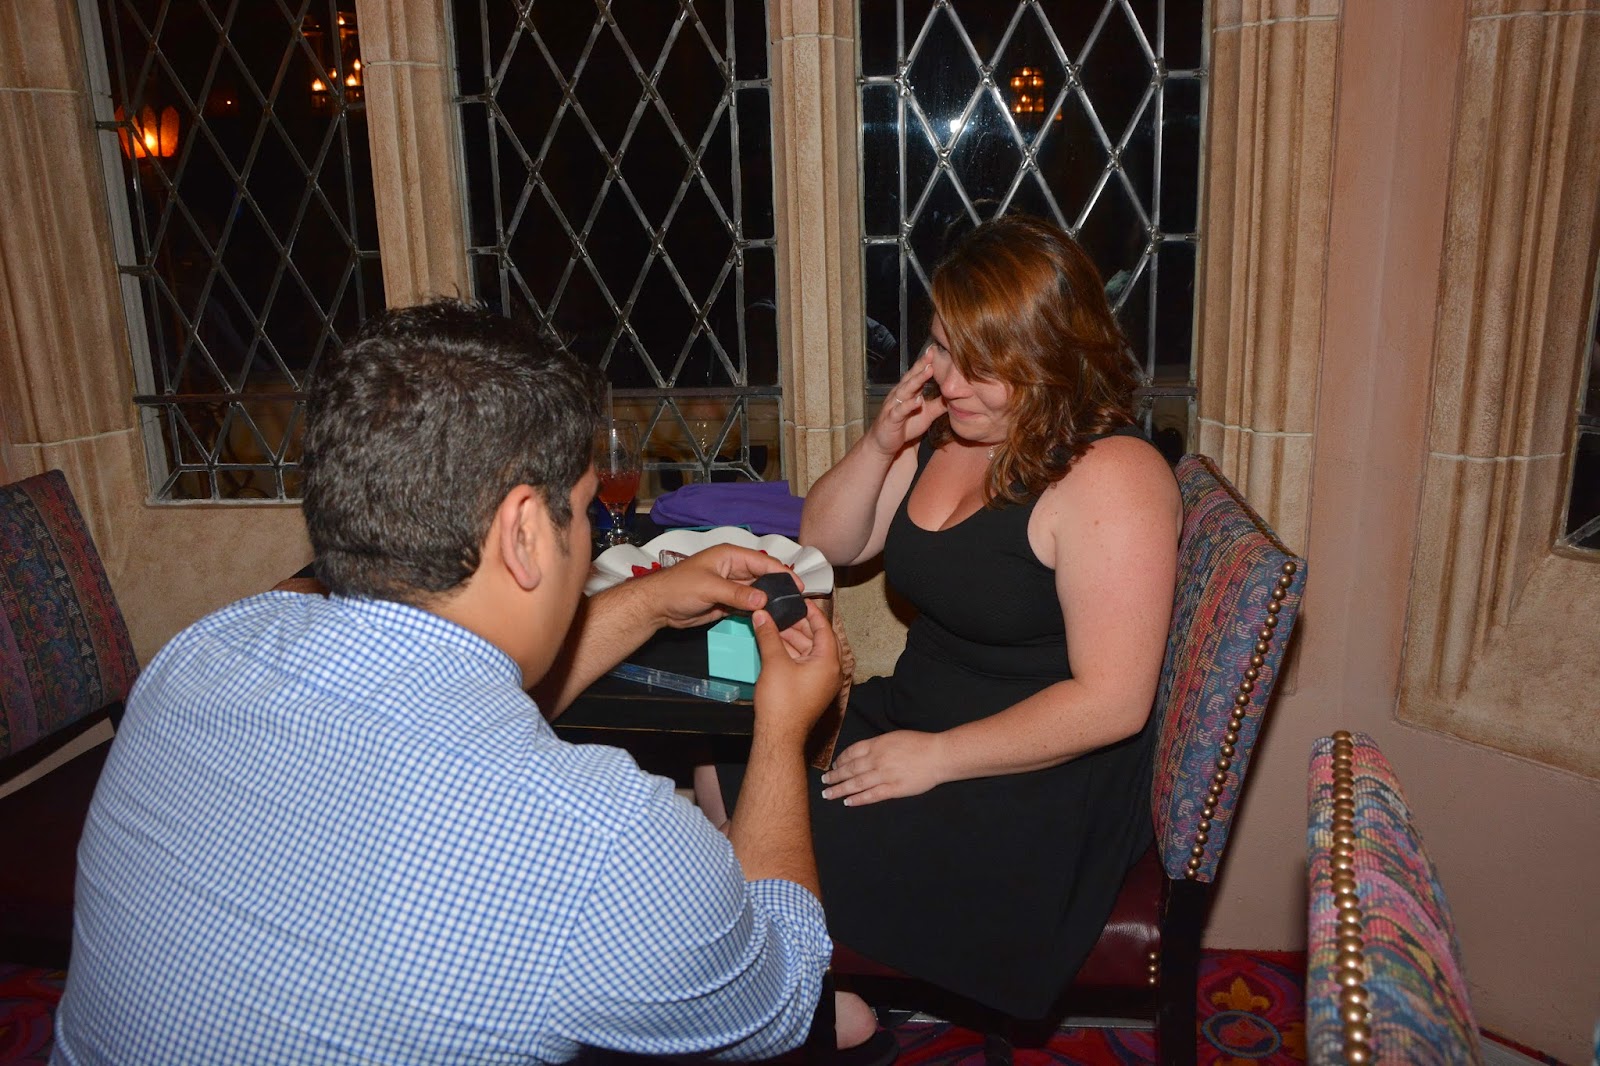
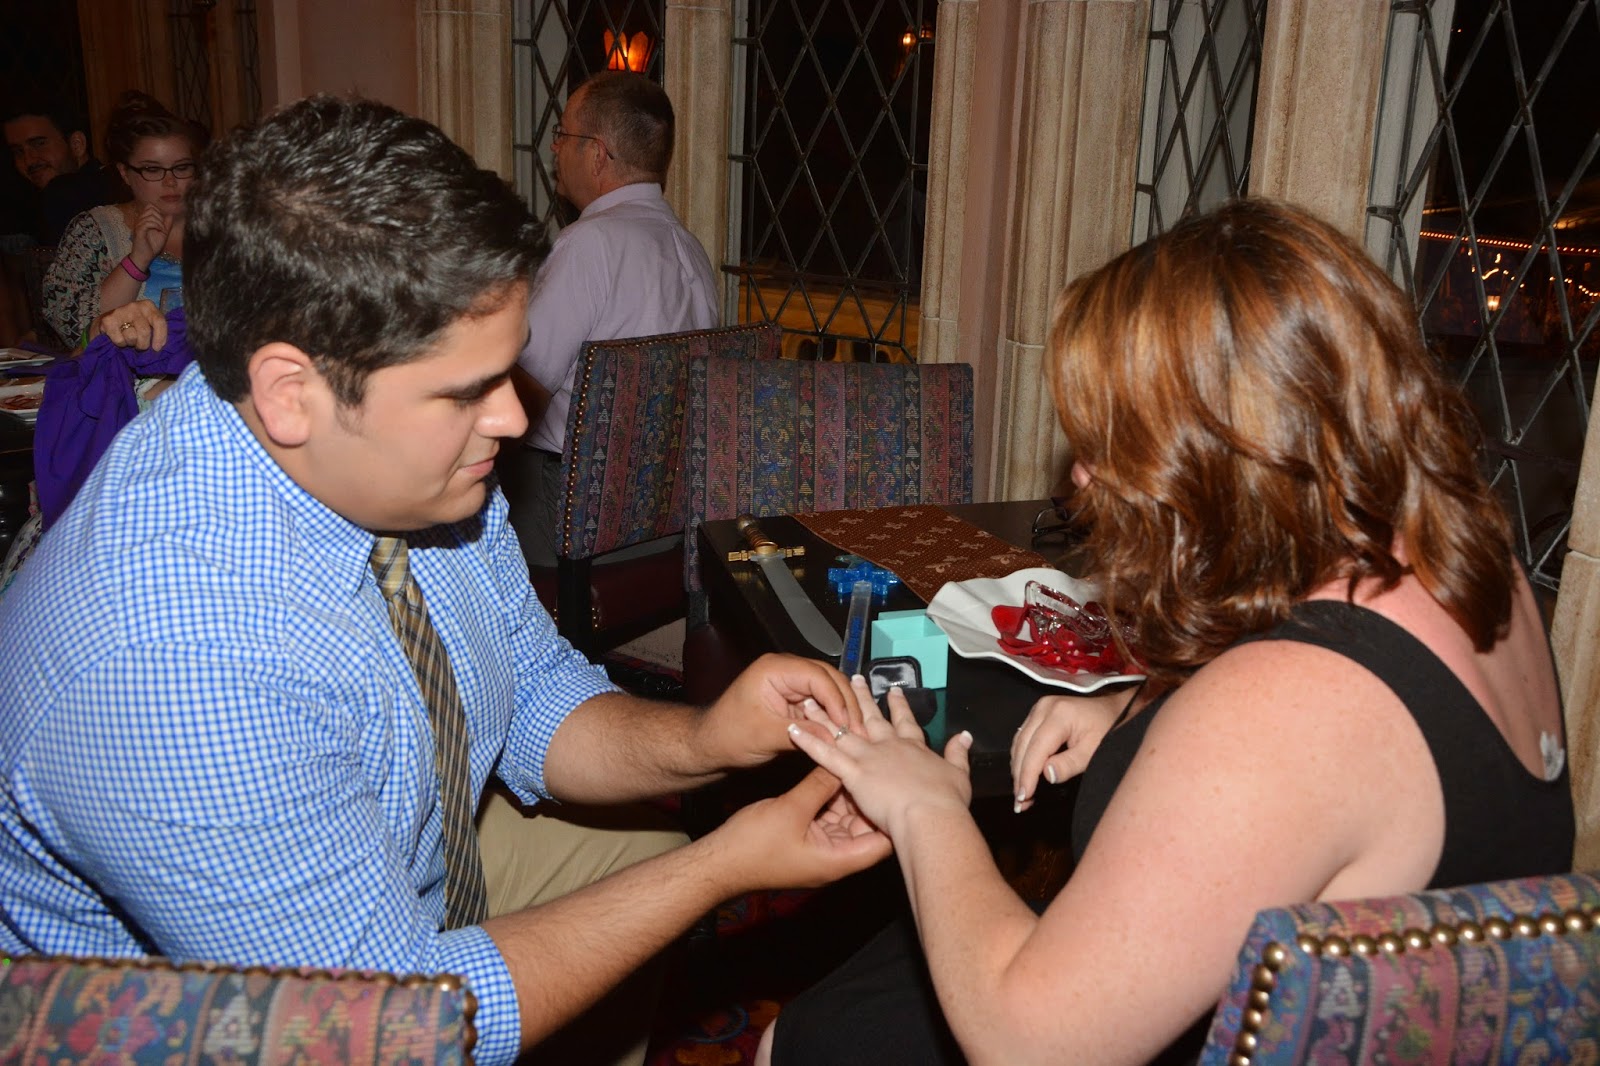
I untie the ribbon from the box, and Michael pulls out the smaller box inside.  On bended knee, he opens the little black box and asks, "Will you give me the honor of being your prince for the rest of our lives?"  At least that's as close to what I remember him saying.


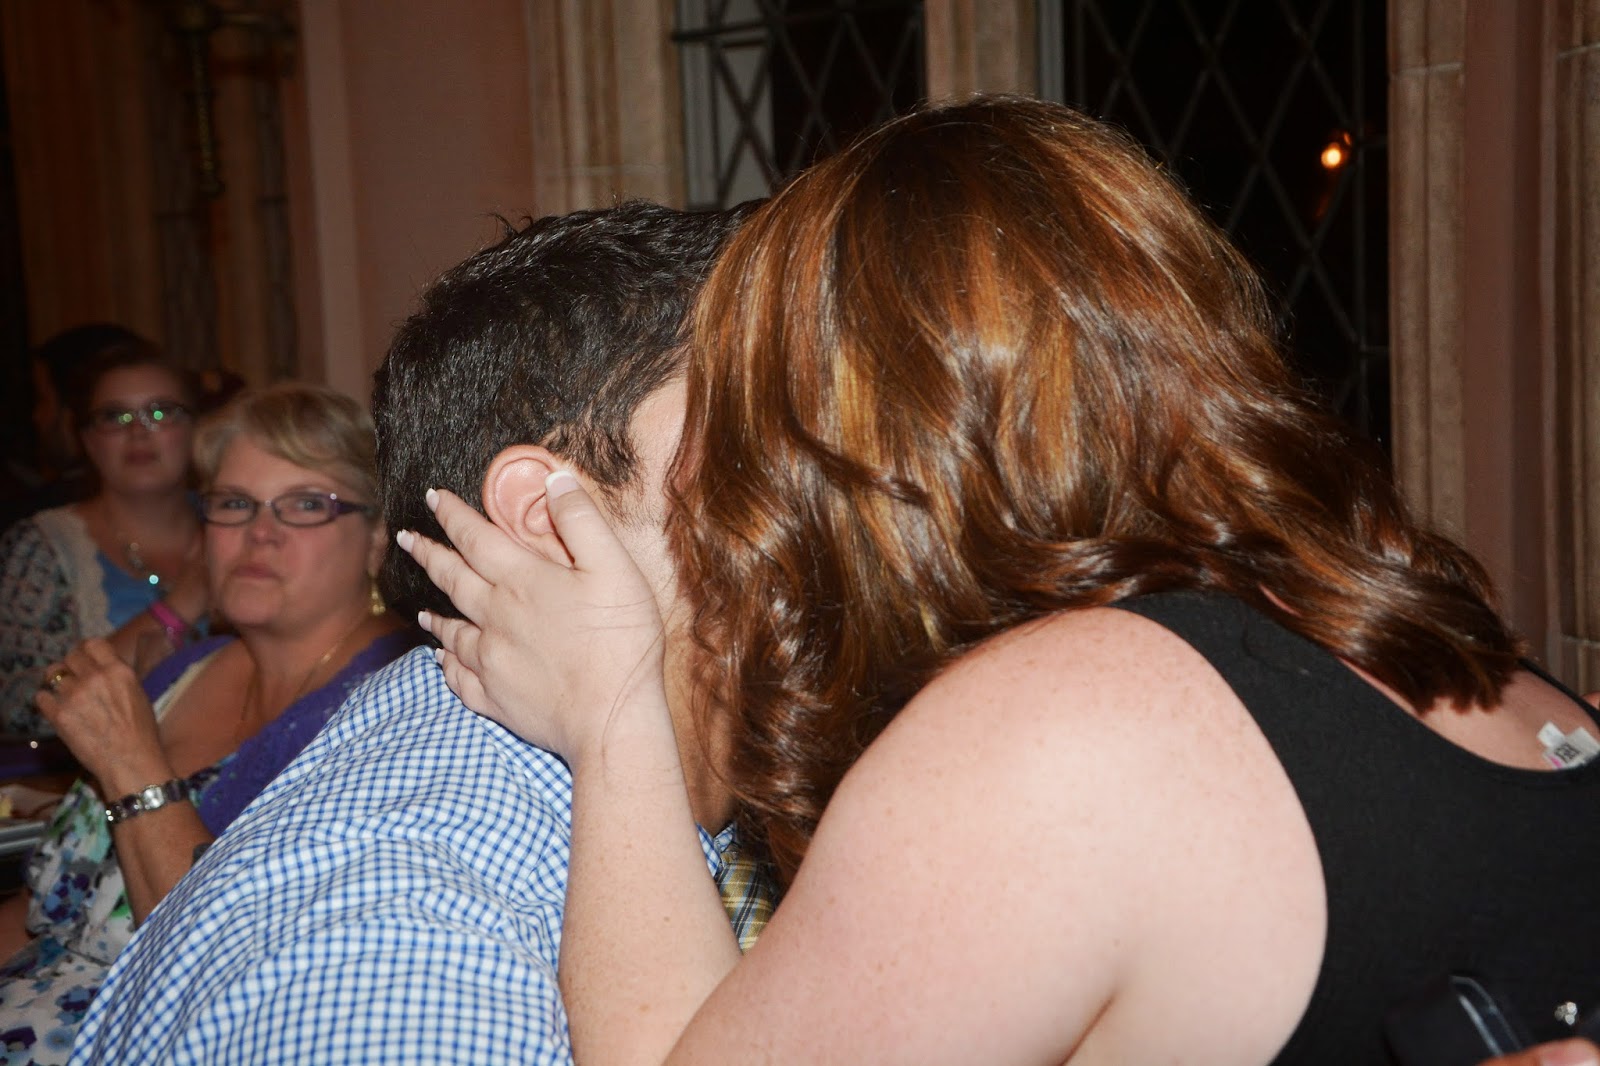
At this point, I am still in shock and still stunned.  Michael says it felt like forever before I answered, and he even heard guests behind him asking "Did she say yes?"  So I said "Yes!" and kissed and hugged him.


He placed the ring on my finger, and the photographer came over and took several more pictures to capture the moment.  I kept trembling for several more minutes, and sighing and looking at Michael, and looking at my ring, and BEAMING with joy.


We were brought two champagne flutes with sparkling apple cider to toast, as well as DELICIOUS desserts that said "Happily Ever After".  They also brought us a box for my glass slipper to bring home, "Just Engaged" Buttons to wear, and some pictures of the proposal.  Jasmine came to our table last, and was joking with Michael.  She said,  "I bet you were nervous carrying that ring around today.  Good thing Abu isn't here, he loves diamonds, and he would've stolen it!"


Everything was so romantically and incredibly magical, down to the last detail.  Michael thought of everything, especially being sure that the whole thing was photographed.  After coming down a little bit from the moment, I called my parents and told them before leaving the castle.  We went over to Space Mountain immediately after and as we were waiting in line, I texted my sisters, my brother, and my closest girlfriends to share the news.  After Space Mountain, it was about time for the park to close, so we started making our way out, meeting a few photographers for some castle pictures along the way.


The rest of the trip was awesome.  Being in the afterglow of a marriage proposal in Disney World is something I would highly recommend.  With the buttons we had on, we were congratulated by Cast Members, strangers, and even some of the characters.  This trip was the absolute best trip of my life and one I will never, ever forget.  Disney was always a special place to me, but has taken an even tighter grip on my heart forever.  I feel like the luckiest woman in the world to get to share the rest of my life with such a thoughtful, committed, fun, romantic, and loving man...my very own Prince Charming.  He definitely has my heart.  Forever.

 
Get some great tips and plan with other Disney fans here: http://www.disboards.com/

Friday, January 3, 2014

Making 2014 Count

Looking back now at where I left off, I cannot believe....REALLY...cannot believe it has been over a year since I have blogged.

Life has changed significantly since then.  I started a new job in August 2012, which has been quite a change.  Not only that, but I have met and been with an amazing man since the end of last November.  A new job and a new relationship took priority over a lot of things the past year, one of which was keeping up with this blog.  I occasionally would check my "stats" and feel like I was missing out on some great opportunities.  Pinterest brings a lot of traffic!  So I am back.  With some new ideas and inspiration and exciting things to write about.  (I plan to do a catch-up post in the near future, but there are more important things to get to today).

In reading through some of the blogs I follow, I came across this amazing idea to carry me into and through the next year over at Little Baby Garvin.  Several amazing ladies are linking up with each other (and who ever else wants to join) to share their New Year goals and aspirations.  What intrigued me about this idea is the challenge to come up with one word that encompasses the heart of what you want to accomplish in the coming year.  You have probably seen several words pop up on blogs and instagram (my username is staceycarleen) this week (#making2014count, #olw, #onelittleword).  It seems in a world where there is so much rush and chaos, we as a society are getting to a point where enough is enough.  It is time to slow down, narrow down, and use one word to guide us, year by year.  So I thought, what a better way to jump back into the blogging world?  Which brings me to my word for this year...


If you ask my parents (and probably some friends and past boyfriends), commitment has always been a struggle for me.  I would start playing a sport, and quit.  Start a new hobby, and quit.  Start a new job, and quit.  You get the idea.  This issue affects a lot of different areas of my world, which is why I thought it would be a good foundation to live by this year.  

This year, I want to commit to learning how to use my new camera.  Michael got me one for Christmas, which is something that I have been wanting for a long time.  Years.  If you have kept up with my blog before, you know that photography is something I have considered trying to pursue professionally.  I want to commit to learning how to photograph, not just be a person with a good camera.

I want to commit to being healthy.  I know health and wellness is on just about everyone's resolution list, but for me this has been a long-time goal, and something that I....you guessed it, QUIT!  I have been successful in losing weight before.  I have been successful in being in good shape before.  Heading out of "young"-adulthood and into being a real, live, grown-up, there are a lot of things, events, and reasons for me to be HEALTHY and in shape.  It's not about looking great in a bikini (though that would be nice).  It's about longevity.  Learning habits and living habits I want my (someday) kids to have.  Being able to be active if I want to join in on a fun 5k next weekend, instead of missing out.  

I want to commit to living more.  Loving more.  Creating more.  Learning more.  There is so much to life that I know I miss out on because "I don't feel like it" or "it's not worth the hassle".  I want 2014 to be a year that I look back on experiences and events and memories...lots of them.  Not just a handful of good days because the rest just kind of ran together.

I could elaborate on how else I want to commit this year, but that really isn't the idea, is it?  One word.  One goal.  One heck of a year.  

I plan to make 2014 count by committing to commit.  Plain and simple.  

Join me!

PS...I also plan to commit more time to blogging, so be sure to stop by again soon to see what's cookin'!


Tuesday, October 2, 2012

Photo A Day September

Oh, friends, how I have missed you!!  Life has most certainly been moving at the speed of light, and unfortunately, I have accidentally been pushing fun things (like blogging) to the end of the priority list.  Which is crazy, because I even purchased a pocket calendar to plan out my blog posts at the end of July.  Anyway...long story short I'm BACK!  The holidays are right around the corner, and I am so pumped to share some things I did last year and some things I have planned for this year!


To get back into the swing of things, I thought I'd share another Photo A Day challenge that I completed.  If you remember, I did my very first one back in June.  I only got a few days done in July and then slacked off as I was trying to find a job.  I picked up again with September.  Here's the list from fatmumslim:  


And here are my photos:


Follow me (I am 'staceycarleen') on Instagram to keep up with my pictures for October.  Join the fun!  Here's the list:  


Thursday, August 2, 2012

Ombre Dot Cake

One of the things I have sadly gotten away from that I absolutely LOVE to do is cake decorating.  I have posted a few tutorials in the past, like the striped cake where I go over a lot of basics of cake decorating and the simple way to decorate a cheesecake with chocolate.  Being unemployed over the past year, I haven't had the money or reasons to bake and decorate many cakes.  I'm hoping to start again this year and experimenting with different recipes, too.  I'll be sure to share them with you!  

When I was going through my old pictures on my computer recently, I came across a cake that I never shared with you but clearly meant to because of all the tutorial pictures I had available!  I absolutely LOVE this cake design technique and it can be used for just about any occasion.  It's simple, classy, unique, and in my opinion, very impressing even for a new cake designer!  

Here is the photo I took inspiration from:


I think I originally saw this picture on Pinterest back when I first joined.  From what I could tell, the cake above was actually made for a Mexican birthday party.  I think the carnation detail really adds to that theme.  But, when I saw this picture, I fell in love with the ombre dot design.  Now, it would be ambitious to try to tackle the multi-tiered, multi-colored design.  But I thought it would actually be pretty simple to just focus on one color.  

So, when I had the opportunity to try out this new technique, I jumped on it!  During the summers, I work at a summer day camp.  Last year, one of our counselors got engaged and the other found out his wife was pregnant within a week of each other.  So, to celebrate, I brought in a cake!  Here's the steps in case you'd like to give it a try, too...

First of all, I baked two 8-inch round cakes and made a double batch of buttercream icing.  **Side Note:  I almost always make double batches of icing when I know I'm going to be decorating.  It's not that expensive if you have to freeze or throw out extra and it is KILLER when you have to stop in the middle of creative madness decorating to make a new batch**  I completely iced the cake with a crumb coat, let it dry, and did a thick second coat.  I smoothed out the icing as much as possible with a spatula.  You can always use the Viva method to make it smoother, but I wasn't worried about it being completely smooth with the detail I was adding.  


Next, I decided on my colors.  Like I said, it would be super ambitious to try to do a lot of colors.  It's definitely possible, and if you're making a large cake for a large crowd or for an extra special event, it would be worth the time for the outcome you would have.  

For me, and for the simple cake that I was taking to work, I just chose one color and made different shades.  You can do this a couple of ways.  You can either add your food coloring a little at a time, or start with the darkest color and add white icing to lighten it.  This time, I started with white icing and added my food coloring a little at a time.  I started with the light teal color, then added a little green and a little more blue each time until I had four colors.  

However, when I use this design technique again, I will more than likely start with the darkest color and add white icing each time to make it lighter.  This will help to make sure your color is consistent and only the shade changes, not the tone.  (Shade is the same color, lighter or darker - Tone is colors in the same family but different "degrees"...one might be a little more red, another a little more yellow, etc.)  I think it would also be helpful because you would know that you have enough of each color, instead of running out of one having too much of another.  

Here are my colors once they were mixed:


Once mixed, I put each color in its own bag.  You don't have to do it all at once: you can do one at a time, but you won't want to use the same bags because the colors will mix.  That would be no bueno.  Typically, I would tell you to be sure you that all of your colors are mixed and bagged before starting your decorating so that you can go back and forth with colors.  But since this design is really one order of colors and not needing a lot of "touch ups" you could just bag one color at a time to keep your icing fresh.  Oh, and you'll notice that I didn't put any icing tips in my bags.  I just cut the tips off since I was just doing round, simple circles.  Just make sure you hold up your tip when you cut the other bags so that your dots are all the same size!


Once my colors were ready, I needed to decide where to start my line of dots.  I opted to start towards the top and tier down my design.  Instead of starting right on the edge where the top meets the sides, I wanted my line to start about an inch below the edge.  I don't know about you, but I have a hard time making a straight line on a round surface.  To help me out, I used a piece of regular old string.  (Make sure it's not string you found under the couch or in your junk drawer.  Since it's going on something that will be eaten, you'll want it to be super clean.)  It took some trial and error, but I placed and replaced my string around the cake until I was happy with a nice, straight line.  Pull it a little tight so that you make a small indentation in the icing as a visual starting point.  It doesn't have to be super deep, this is just like using a stamp or stencil to trace.


Using my indented line as a guide, I started icing small, smooth dots around the cake.  I placed them close together, and released pressure before pulling away to prevent the "Hershey Kiss" look. I started with my darkest shade as the longest line and the one that goes all the way around.  You could start with the lightest shade, but I like the effect better when it fades away as it gets smaller.


After my line was completed all the way around the cake, I moved on to my next shade.  If you are a perfectionist, you'll want to count your dots around the first line so that you can equally divide your ombre pyramids.  I'm a perfectionist and didn't think about that, but adjusted my "back side" to make it work (more on how to do that in a minute).  With the next shade (one shade lighter than my darkest), I made three dots using the same icing technique and leaving one dot-sized space between each section.  This is going to start the shape of your ombre pyramids.


Continue in the same pattern, using a lighter shade and decreasing the number of dots each time until you get to one.  Since I only used four shades, that meant I did four lines, including the first all-around line.

I didn't want this small cake to be crowded, so instead of repeating the mirror of the design on the bottom, I added my lightest shade dots between each pyramid.  For the bottom, I just used a larger tip with my darkest shade of icing and did a layered, large bead border.


Since the side of my cake was so detailed and gorgeous, I didn't want the top to take away too much attention.  So, I just did simple lettering (with not very good space planning on my part...oops!) to congratulate our friends, the groom- and hubby- to-be.


I am so happy with how this cake turned out and will most definitely do it again!  I think I learned a few things.  Next time, I will start with my darkest color and add white icing to lighten for each shade.  I think I would also try smaller dots and be a little pickier with the straight-ness of my lines.  And of course, better planning for the top!  


Overall, I'm happy with how it turned out and can't wait to try it again!  How cute would this be for a baby shower?  It's so simple and plain, you could really use this design for any occasion.  And trust me....it's super low on the difficulty scale.  If you can squeeze icing through a bag, you can do it! 

LinkWithin

Related Posts Plugin for WordPress, Blogger...