Friday, April 8, 2011

Jeepers Peepers!

It's time again for another wreath!  Actually...time for an EASTER wreath!


I meant to get to this last weekend, but time just didn't allow it.  I saw this idea in a FABULOUS magazine for lovers of creativity, entertaining, and cooking.  It's called "Celebrate" and is done by Phyllis Hoffman.  My mom is subscribed to it, and I always steal borrow it shortly after it comes in the mail to browse at all the cute ideas.  It is a great starting place for party planning, even if you want to throw a party but don't know what kind.  She comes up with party ideas for anything and everything, and everything is cute and coordinated which I love.  The crafts and decor are not ones that LOOK homemade, if you know what I mean.  But most of the ideas are cheap, and the magazine (and website) has wonderful printables.  I will someday subscribe myself so I can have my own collection!  

Anyway...on to the WREATH!  Here is your tutorial for my twist on the one that is in the most recent issue of "Celebrate" complete with pictures:

Here's what you'll need:
1 Flat-Sided wreath form
2 boxes of bunny shaped Peeps (I obviously overbought, but that's ok because I love the fluffy little treats!)
Wide ribbon the color of the Peeps you purchased (Satin is best)
Glue Gun
Scissors
Ribbon for hanging
Jellybeans to coordinate if you choose

Step One:
Wrap your wreath form with your ribbon, placing a dot of hot glue every now and then to secure it in place.  I accidentally bought the ribbon that is stiffer, so mine doesn't look as smooth as it would if you used satin ribbon.  However, I knew that it would be covered, so if it's cheaper you can use it!

Step Two:
Lay out your Peeps.  DON'T glue them down yet!  I just laid mine out to get the spacing.  To help it look more fluid, I only separated the peeps at the ears and heads, and left their bootylicious hips attached.  This gave me a very close idea of how many would fit.

Step Three:
Attach your Peeps to the wreath using TINY dots of hot glue.  I put one under each bunny.  I ended up  taking one bunny out eating one bunny to make my wreath even.  I started with one set of four and moved around, letting the hot glue sit on the wreath for about 30 seconds before placing the Peeps so they wouldn't melt or roast from the heat.

Step Four:
This is where the twist comes in.  Phyllis Hoffman left her wreath with just the Peeps, but I wanted to add a little more color.  I checked out the jellybeans in the grocery store to see if I liked anything and found these WONDERFUL pastel Lifesavers jellybeans that were on sale.  I love the color of them, and think I'll actually put the rest in a glass bowl for my table decor.  After playing around with different colors and patterns I decided on using blue, green, and purple to add some contrast, but still keep some sophistication and not getting to childish with all the colors.  To place them, I just put another tiny dot of glue between the each two bunnies, then squeezed the jellybean in between.  You don't have to push it all the way to the glue, but it helps keep it in place once it's hardened.  I pushed mine only about halfway down, the fluff of the Peeps hold them in place.  They touch the glue just enough for secure placement.

Step Five:
I might change this on my wreath, because I didn't take my time and didn't like the kind of ribbon I was working with.  If you do want to make a bow, here's what you do.  Cut a strip of ribbon that is the length of the bow you want when folded in half.  Glue the two ends together to make a ring.

Step Six:
Use another piece of ribbon and glue it around the center of your loop.  I ended up folding the ends under to make it look nicer.  Here's what it will look like on the front:


Step Seven:
Pull the center together and use a safety pin to pull it together.

Step Eight:
Attach another piece of ribbon, folding over and gluing the end you attach.  You'll attach one on each side of the center.

Step Nine:
To make a finished edge, fold the ends of the ribbons in half, and cut at an angle.  They should look like this:


Step Ten:
 I attached a thin ribbon to the back of my wreath to hang it, and attached the bow to my hanger separately.


And there you have it!  Cute little Peep wreath for Easter!  Hope everyone is enjoying some sunshine and Spring weather!

Tuesday, March 29, 2011

Spicy & Sweet Bachelorette Party!

The rush has finally ended!  I have been working like a busy little bee the past few weeks to prepare for an AMAZING party for one of my dearest and best friends, Beth.  She's getting married at the end of May and I couldn't be happier for her!  She currently lives in West Virginia, but also has a lot of friends in the Nashville area.  So I decided to host her lingerie shower and bachelorette party.  It was a blast to plan and I'm learning how much I LOVE planning parties and being creative with all things entertaining.  Now that it's over, I can finally unveil everything I've been keeping secretive.  For this post, I'll just give you a quick run-down of some of the things we included.  Later on, I'll do an individual post for invite how-tos, game explanations, favor assembly, etc.  For now, enjoy these:


More to descriptions and explanations to come!  I just had to share something!

Wednesday, March 2, 2011

March Springtime Wreath!

Ok, I PROMISE there will be a surplus of blog posts in a few weeks.  I'm crafting, but keeping things under wraps until after my friend, Beth's shower.

In the meantime...it is March and time for a new wreath for my door!  Remember the heart wreath?  Well, that was fun and cute for February and Valentine's Day, but it was time to move on!  I wanted to do something green for St. Patrick's Day.  However, I didn't want to to be too cheesy or too shamrock-y because I wanted it to be able to stay up later than just for the holiday.  When I was trying to come up with ideas for this wreath, I decided I wanted it to be bright and colorful...something that looked "springy".  I also wanted it to have a lot of texture and fabric, but be different from my February wreath.  So...this is what I came up with:

It was SUPER easy, SUPER cheap, and SUPER fast!

Here's what you'll need if you want to make one similar:
  • A foam wreath form.  You could do any shape, any size.  Mine is an 8-inch round. 
  • Fabric in color/texture of choice for the main wreath.  I used a remnant of green soft flannel cotton I found in the bin at JoAnn's.  You could also use ribbon.
  • Extra fabric scraps for the flower/accent decor.  I didn't have a lot to choose from at home (at least not in the colors I wanted), so I bought this pack of quilting squares for $5.00 at JoAnn's.  
  • Scissors
  • Hot glue gun
  • Straight pins


Here's the steps I took:
  1. Snip the end of the fabric in about 1 inch sections.  


2.  Grab both sides of the slit, and pull apart to the other end.  Most fabric will naturally tear through in a straight line without a lot of effort. 


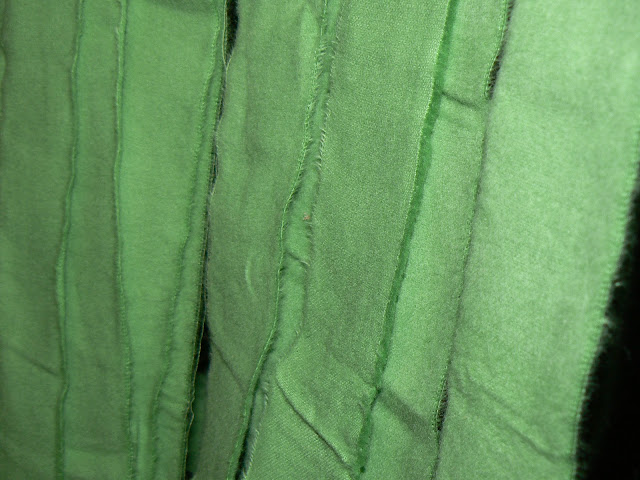
When you're done, you should have a bunch of strips like this with beautiful, slightly frayed texture!


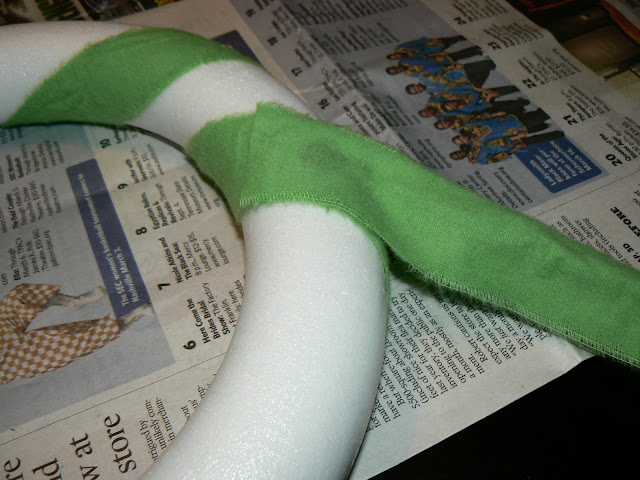
3.  Glue down the end of the first strip and wrap around the wreath.  I put a dot of hot glue about every two-three wrap arounds on the back side.  I glued it at a slant so that the fabric wouldn't bunch up in the center.  


When you get to the end of one strip, glue it down, then start the next strip in the same spot you ended the first. 


4.  Continue wrapping around with the strips until you get all the way around the wreath form.

5.  Continue wrapping and gluing strips until you've covered all the white foam.  Then, I pulled up the ends on the back and snipped the excess.  

6.  I pulled out all the scraps to decide.  Here were my choices:


I narrowed it down to these three.  I added a fourth later because I still needed some more "fluff" to make my flower look right and cover the pins. 


7.  Cut each square in two pieces.  It doesn't matter if you use a straight pair of scissors or pinking shears.  I used two squares of each pattern.  


8.  Fold each piece like an accordion.  This reminded me of making paper fans when I was little.  :o)  


9.  Stick a pin through the end and just stick all the little fans in a cluster on your wreath.  This part took the longest, because I played around with the different arrangements, fluffing them in different ways, making sure the pins were covered, etc.  I chose to cluster mine off-centered.  


10.  For the hanger, I just used an extra scrap of fabric and hot glued it really good.  


Here's my flower cluster:


And my final wreath:


I like the way it turned out, but I may add a little more "something"...not sure what yet.  

Hope you like it!  This can definitely be modified for other holidays/months/themes with different colors and fabrics.  Have fun with it!

Look forward to my April wreath for Easter.  I'm SOOO excited about it and it is SO easy and fun!


PS...This is my first time ever, but I'm linking up to Under the Table and Dreaming.  Head on over for some more great ideas!


Saturday, February 19, 2011

Long Time, No See!

Hey there, readers.  It has been quite a while since I've been able to post a good quality blog!  Life has been busy now that we're back to full weeks of school and the weather is getting nicer.  I'm trying to spend more time outside, rather than inside on the computer or glued to the TV.  But that's not to say that crafting, cooking, and celebrating are going to slow down!  In fact, my "creative life" has exploded in the past couple of weeks!  I'm in the midst of planning and preparing for my best friend, Beth's lingerie shower/bachelorette party that I'm hosting at the end of March.  So I've been busy brainstorming, gathering inspiration, and working on design for the shindig.  I don't want to give away too much, yet.  That's part of the reason I haven't posted much.  I love the element of surprise, especially when it's a party!  So I'm keeping most of what I'm up to under wraps until the bride-to-be herself gets to see and experience it.  I'll share little tidbits along the way, and would be happy to share what I'm doing with you individually if you're trying to come up with something before April.  But I'll save most of my blog posts related to her shower until afterwards.  I will tell you what I've already told her, though!

As I was looking for ideas for showers, I came across this cute, cute idea from 100 Layer Cake for a Sweet & Spicy shower.  It is PERFECT for Beth, because, well...she and I are pretty much exactly alike when it comes to "bachelorette party" -type things.  I knew she would want something that is classy and nice, something more sophisticated than what most bachelorette parties end up being.  But I know that she wants to also take advantage of this time in her life and that it's okay for things to be a little risque.  We're not doing penises everywhere...in fact I don't know that we will do them anywhere.  But it IS a lingerie shower and bachelorette party, so there will be some "spice".  Anyway...this sweet & spicy theme is perfect because it blends the best of both worlds.  We can keep the class, but bring in a little sexiness, too.  I know she says straight off in her blog post that most showers aren't as designed as this one, but I am using it as inspiration.  It's fun for me, and kind of interesting to dip my toes into the party planning world for a bit!  I chose to do things a little bit differently...not copying exactly what she shows in her pictures.  For the color scheme, I chose to use a deep midnight/navy blue, bright pink, and a hint of Kelly green.  I love that color combination and it reminds me of Beth...some colors she might put together in an outfit.  She's very stylish and always looks cute and sophisticated.  :o)

The plan is to start at my apartment to open gifts, play some games, snack, and get acquainted with each other.  We're all coming from different parts of the country, so we'll need time to loosen up and get to know each other.  After the lingerie shower, we'll head out to dinner, then down to Nashville for a girls' night out.  It should be a ton of fun!

Well...I don't want to bore you with too much information, and I want to save some for later on.  This weekend, I've been working hard on the invitations.  I definitely want to get them sent out this week.  I've got some more work to do on them, but here's a preview:

I'll do a full tutorial post once I send them out and give the girls time to receive them.  I'm so proud of how they are turning out!  I'm still not quite done, but getting there!  I think my biggest challenge will be finding envelopes to fit them in.  I saw some at JoAnn's today, but they were vellum and see-through...not ideal for mailing.  

Hope everyone is enjoying the weekend, and is hopefully getting warmer weather like we are here in Nashville.  Goodnight, all!

Thursday, February 10, 2011

Game Day Goodies

I was going to be ambitious and try to post some recipes for the Super Bowl BEFORE the big game, but ended up not making it.  I'm still giving ya'll some recipes to try!  Here's what I made this year:

1.  BBQ Ranch Deviled Eggs.  I saw this recipe on Food Network one day at mom's, so decided to make them for the game.  They were YUMMY!  I didn't have any green onions, (and apparently the Kroger near me doesn't sell them) so we were missing that element.  They were delish without, but I can imagine how much better they'd be with the onions!  Here's my attempt:


First, I thought I'd be cool and try to keep the eggs from sliding by using grains of rice.  I've seen rice used as a presentation base on platters before, so I thought it would look nice and keep my eggs from sliding around. Plus, I have about 4 bags of rice (you can get this brand free from the grocery store with coupons), so I wasn't really risking much.


It was a good idea in theory because the eggs DIDN'T slide around.  However, then I picked one up and it was coated with rice on the bottom.  I didn't want my eggs to be crunchy, so I dumped the platter and started over.  

By the way, this is the BEST way I've ever hard boiled eggs.  Every time I've done it in the past, I end up tossing a couple because it's hard to peel or deformed, etc.  I put all the eggs in the bottom of the pan, covered with cold water and brought to a boil.  I then let them boil for two minutes, turned off the heat and covered the pan.  13 minutes later, they were done!  


After I mixed up the yolk mixture, I used an icing bag and start tip to make it look nice, and make it easy to fill the eggs.  


The final step was to drizzle with a bit of BBQ sauce.  I just snipped the tip of a Ziploc bag for this part.


Then to transport them, I used a small glass to cover the center egg and wrapped the platter in foil.  It only smudged one egg, but the rest were pristine after the trip to my parents' house.  


Recognize that platter?  That's my $1.00 platter from Goodwill that I posted about yesterday!

2.  Game Day Bars.  I found this recipe while looking for something to make for dessert for my community group gathering on Sunday.  I brought the leftovers to the game.  They weren't bad, but not my favorite.  They had chocolate chunks, peanuts, and pretzels mixed in and are similar to a cookie bar. 


 3.  I found a box of yellow cake mix in my pantry, so I also made Gooey Butter Cake (Paula Deen's recipe, and my go-to recipe).  I forgot how delish it was!  I think this will be my birthday cake this year!


Here's a couple that I didn't make this year, but I LOVE for watching a game:

4.  Hoagie Dip.  Fell in LOVE with this last year when I made it for the Super Bowl.  This was something I saw in Food Network Mag.  If you're a foodie, I recommend subscribing.  It's like Christmas every time I get one in the mail.  I drop everything and sit and flip through to see what's new.  It's not just recipes, but there are plenty of good ones!


5.  Beanie Weenies.  Everyone calls them something different, but always a favorite!

6.  Dorito Dip.  I remember my mom making this when I was a kid.  It's not real healthy, but MAN is it GOOD!  Just mix this up, and serve it warm with Doritos.  I remember always sprinkling cheddar across the top once it was eaten and re-heating it.  I had mom send me the recipe because I couldn't find anything close enough online:

8 oz sour cream
1 lge pkg Philadelphia Cream Cheese

Blend w mixer then add:

1/2 cup chopped onion
1/2 cup diced tomatoes
1/2 cup diced green peppers

Add these to cheese mixture. Then sprinkle with shredded cheddar cheese & Lawry seasoning on top. Pop in microwave for 3 min. or until cheese melts.

7.  Amaretto Fruit Dip.  This is a different tasting fruit dip than most people are used to, but I think the amaretto flavor adds the perfect "nuttiness".  Mix this up and serve with fruit like cantaloupe, honey dew, and strawberries.  However, I think the BEST with this dip is red and green apples and bananas.  YUM!

8.  People Treats.  Well...that's what my family calls them now.  They're really bacon-wrapped crackers, sometimes called "Candied Pigs".  They're easy, though they do take some time.  I don't even need to look at the recipe anymore because they've been requested so much.  They're always a huge hit at parties and potlucks because they're so different and so good.  

9.  Veggie Pizza.  I kind of make my own variation of the linked recipe.  This is a good, healthy option for snacking.  I top mine with broccolini (it's broccoli, but tinier...perfect for bite-size snacks), carrots, green and red peppers, cherry tomatoes, and celery.  

And since I have mild OCD and need to end with an even number, here's one if you are the host and need to provide the main meal:

10.  London Broil & Portobello Sandwiches.  I made these for the first time in high school.  They're filling, delicious, and not too complicated but make you look like a gourmet chef.  

Hope you found something you can use for upcoming parties or bookmark for next football season.  If you have any good recipes to share, please do!  I'm always looking for more to add to my collection!

LinkWithin

Related Posts Plugin for WordPress, Blogger...